
")

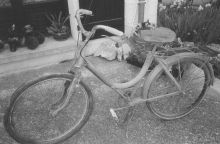
Collection de Velosolex
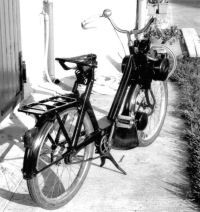
Solex 1400
Un 1010 qui aurait des roues plus petites est sûrement un Solex 1400 ! Les roues de 1,75 x 19 sont maintenant standars et le resteront jusqu´aux derniers modèles à galet.
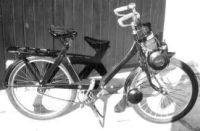
Solex 1700
La particularité du Velosolex 1700, c´est l´apparition de l´embrayage automatique. Une nouveauté chez Solex ! Le moteur reste désormais en marche lorsque le Solex est à l´arrêt.
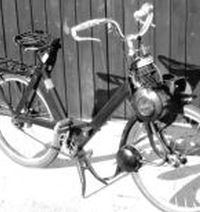
Solex S2200
Le Solex S2200 est le premier Solex avec un antiparasitage. Cette amélioration exigée par la popularisation des radios se traduit par le capotage de la bougie par le filtre à air.
Solex S3300
En construction
Solex S3800
Le Solex S3800 est équipé d´un nouveau cadre en tôle pliée, dont la géométrie angulaire tranche avec le cadre arondi des modèles précédents.
Solex 5000
Ma passion pour les Solex
Une loi récente qui oblige l´immatriculation des Solex. J´ai pu a grande peine immatriculer 8 Solex de ma collection. Je vous raconte comment immatriculer votre Solex.
Je partage avec vous à travers ce site ma passion pour ces Velosolex de collection. Au travers des années, j´ai beacoup appris sur les possiblités de les restaurer. J´ai eu la joie de rouler avec divers anciens Solex sans embrayage ou en Plisolex (2 dont 1 toujours en ma possession!).
Le plaisir de rouler avec ces Solex
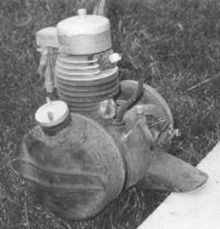
Réfection d´un moteur de Solex
Les différents moteurs de Solex sont relativement simples et standards. Les nouveaux modèles ont toujours remplacé leurs prédéceceurs avec uniquement quelques évolutions. Cela présente l´avantage de pouvoir trouver des pièces parfois neuves comme les pochettes de joints et de les utiliser sur d´anciens modèles. Une mécanique accessible !
Restaurer son Velosolex
Les Vélosolex les plus anciens ont cette année pas moins de 60 ans. Après avoir longtemps fréquenté les routes de France et d´ailleurs, ils dorment aujourd´hui bien souvent oubliés dans les garages et autres débarras. Les brocantes sont un bon lieu de prospection pour en trouver un mais il y de forte chance de le trouver en état "sortie de grange" lors de son acquisition. Cadre rouillé, moteur bloqué et manque de pièces sont souvent de mise et exige la réalisation d´une restauration complète !