The different Solex engines are relatively simple and standard. The new models have always replaced their predecessors with only a few changes. This has the advantage of being able to find sometimes new parts such as seal kits and use them on old models. Accessible mechanics!
In addition, some parts are interchangeable according to the models although they are not completely identical. This will not satisfy the purists but will allow some Solex to turn while waiting to find the original piece...
Heart of the engine
- Cleaning the engine: To be done with a brush and a degreaser (gasoline for example).
- Disassembling the engine: It is attached to the frame four screws that are to be disassembled with the one holding the gas control on the carburetor. Once the engine is removed, the engine support triangles are accessible and treated in the same way as the frame. The disassembly of the air filter, the spark plug, the cylinder head and the cylinder do not pose any particular problems. If the piston is locked in the cylinder, it is necessary to disassemble the side of the crankcase then the nut which holds the connecting rod on the crankshaft. With the cylinder unbolted, simply lift the piston rod cylinder assembly by turning the crankshaft and remove the assembly by the side. After leaving the cylinder filled with grease trap for several days, remove the hammer piston with a wooden block. At best the connecting rod, or even the cylinder if it is not marked, are to recover.
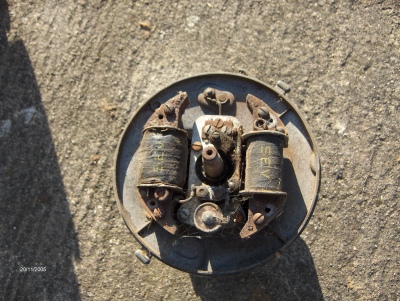
To unlock a piston locked in the cylinder, here's a tip: put the whole in the freezer, because the aluminum retracts more than the cast iron so the game cylinder-piston increases with the cold. It is then easier to unlock it. - Ignition: The magnetic flywheel can be removed by dismounting the fixing nut and using an extractor. The various ignition components, coils, platinum screws and condenser are now accessible and must be cleaned. For some models, they are available new. This stage containing the ignition is fixed by 3 screws. Their disassembly allows access to the clutch then to the bearing. It is not necessary to disassemble everything if the Solex does not have defective parts.

- Fuel supply: The fuel pump, the tank and the carburettor must be disassembled, cleaned and reassembled. The nozzle of the carburettor can be opened with compressed air. The screws of the fuel pump are to be tightened only slightly for reassembly at the risk of breaking.
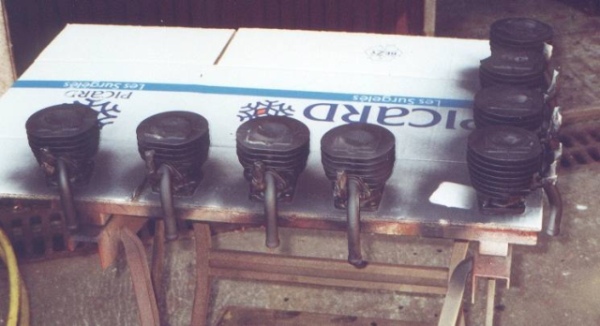
- The cylinder and the cylinder head are to be blasted or sanding (fine sanding!). To do this, mount the cylinder head on the cylinder and make a sheet metal part to close the base of the cylinder, or better, mount two cylinder-head assemblies. An old candle will be enough to plug the breech. The cylinder head must then be polished with iron straw and the cylinder painted black with a high temperature paint.

- The step of reassembly: The pocket of joints and the segments for engines 49cm³ are available new with the re-fabrications of Solex. It is possible to make some paper seals yourself for other models. The contact surfaces between cylinder head, cylinder and base must be clean and smooth. Oil the connecting rod and slightly the cylinder while reassembling. The compressions must be checked while running the engine.


